Android
Because Google is phasing out their stock 'Mail' app in favor of their Gmail app, we will show you how to add your e-mail address to the Gmail app. However, we recommend using an app called K-9 Mail. The main difference is the Gmail app does not offer Push support for non Gmail accounts. In other words you will not be notified immediately after receiving an e-mail, your device will instead check for mail every X amount of minutes. K-9 Mail supports Push notifications so you will be notified immediately upon receiving the e-mail. We will show you how to add your e-mail account to both the Gmail app and K-9 Mail.
Option 1: Gmail.
- Make sure you have the Gmail app downloaded to your device, then open the Gmail app.
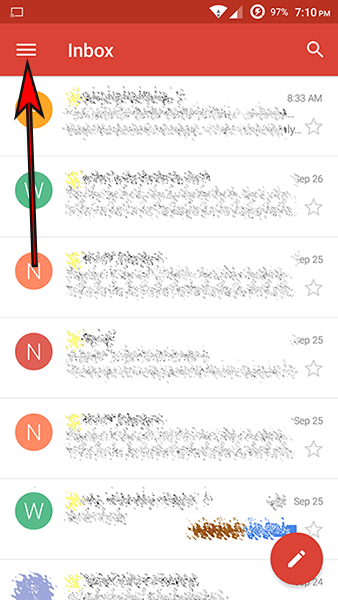
- Click on the 'Menu' icon on the top left of the app
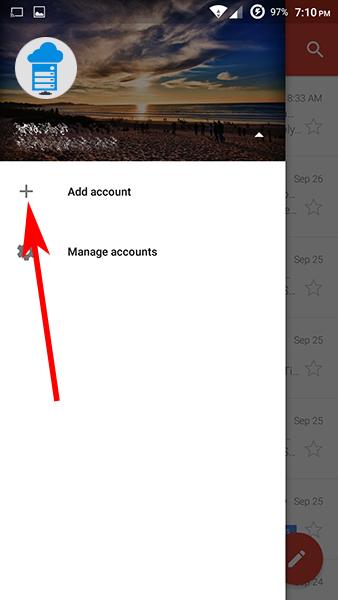
- Click on '+ Add account'
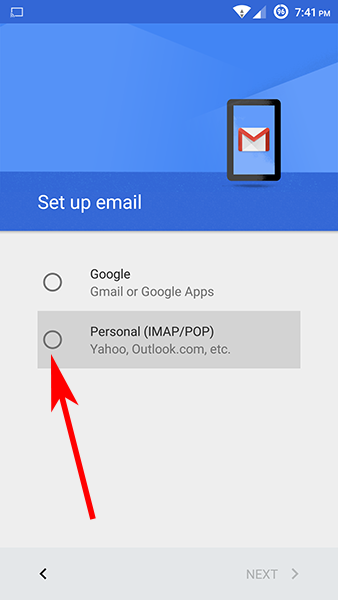
- On the following screen, select 'Personal (IMAP/POP)' and click 'NEXT >'.
- Now, enter your e-mail address. Use your full e-mail address and your domain name (not safecloudservers.com). Ex: john@mydomain.com. Click 'NEXT >'
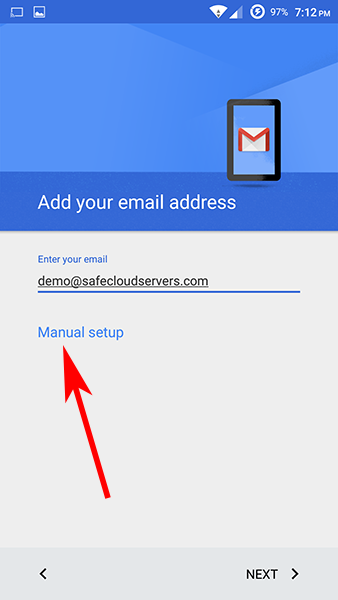
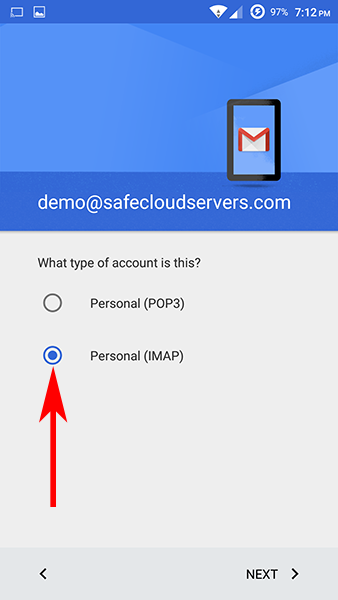
- On the next screen, select 'Personal (IMAP)' (you may choose Personal (POP3) if you want) then click 'NEXT >'
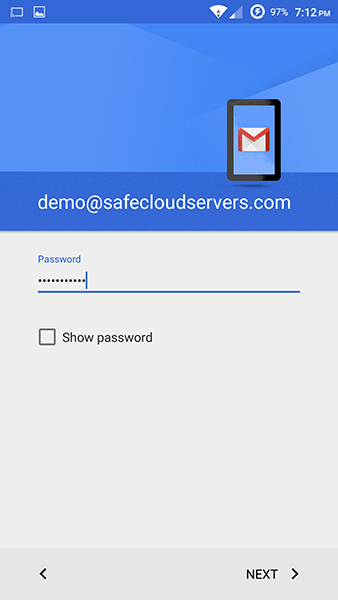
- Type in your password then click 'NEXT >'
- Use the following information on the next window then "NEXT >"
Username: your e-mail address (Ex: john@mydomain.com)
Password: your password
Server: mail.yourdomain.com (Ex: if your domain is mydomain.com, put mail.mydomain.com)
Port: 143 (If you are using POP3, use port 110)
Security Type: None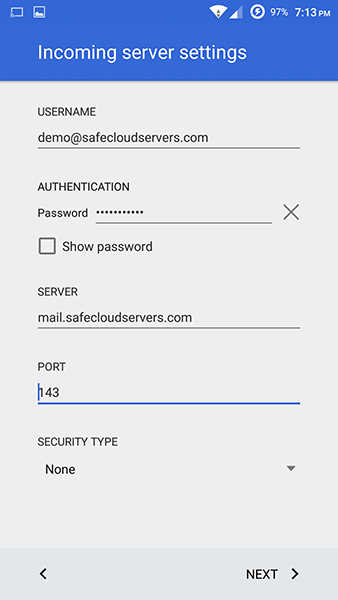
- Use the following settings on the Outgoing Settings screen, then click "NEXT >".
SMTP Server: mail.yourdomain.com (Ex: if your domain is mydomain.com, put mail.mydomain.com)
Port: 587 (If using POP3, use port 25. If 25 isn't working, try 26)
Security Type: None
Username: your email address (name@domain.com)
Password: your password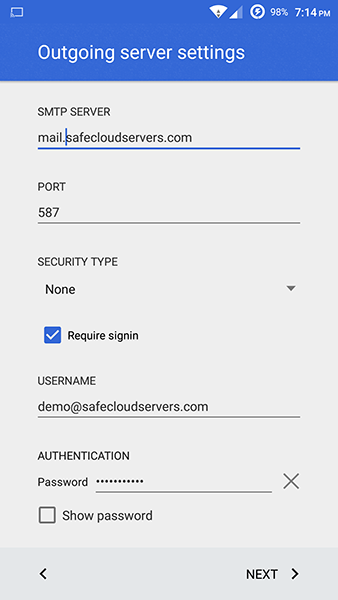
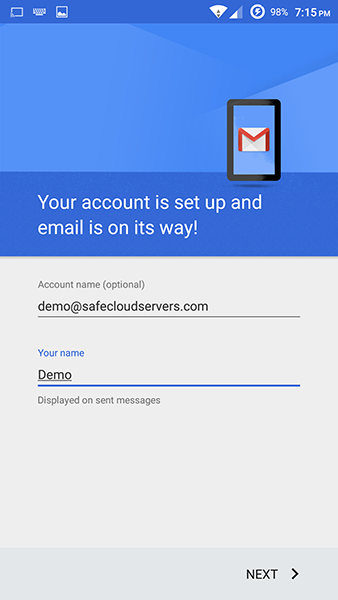
- On the next screen you may put whatever you want for the account name and put your name where it says Your name, then click "NEXT >"
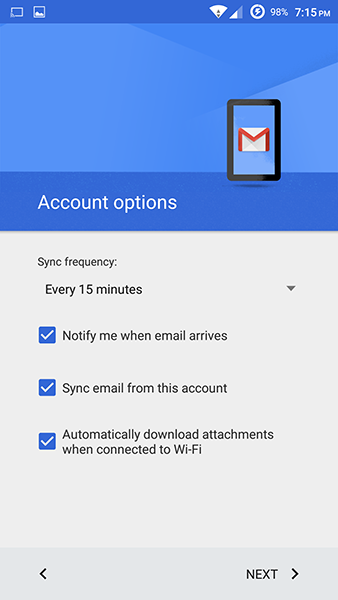
- Here you will choose the sync frequency and other options. Here is what typical settings look like. Click "NEXT >" and then you're done!
Option 1: K-9 Mail.
- Make sure you have the K-9 Mail app downloaded to your device, then open the K-9 Mail app.
- Click on the + on the bottom of the screen

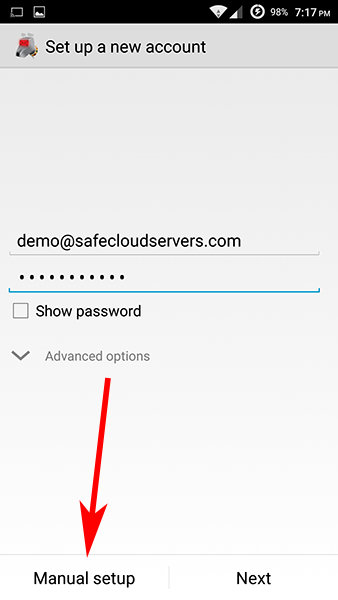
- Next, type in your e-mail address and password, then click "Manual setup"
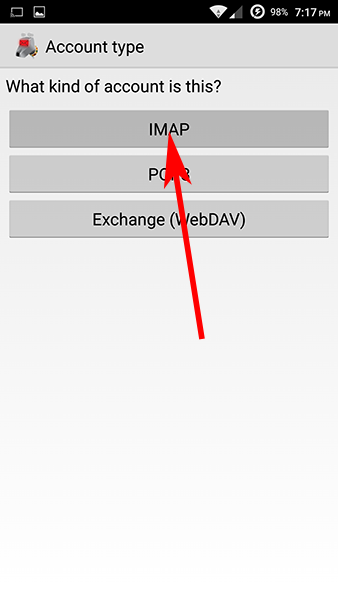
- On the next screen, click IMAP (You may also choose to use POP if you wish)
- Use the following settings, then click "Next".
IMAP Server: mail.domain.com (substitute domain with your domain name)
Security: None
Port: 143 (If you are using POP3, use port 110)
Username: Your email address (Ex: john@mydomain.com)
Authentication: Password
Password: Password to your email address
Keep the rest of the options checked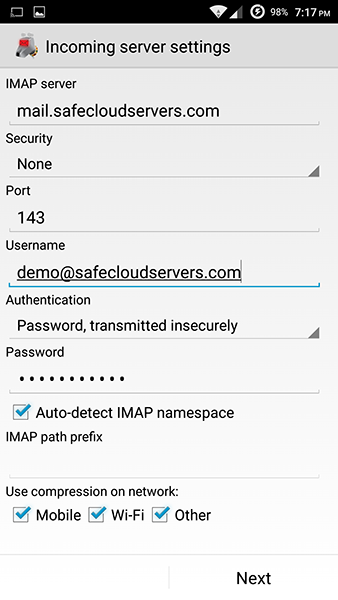
- For the Outgoing server settings, use the information below then click "Next".
SMTP Server: mail.domain.com (substitute domain.com with whatever your domain name is)
Security: None
Port: 587 (If using POP3, use port 25. If 25 isn't working, try 26)
Require sign-in: Selected
Username: email address (ex: john@mydomain.com)
Password: password to the e-mail account
Authentication: Password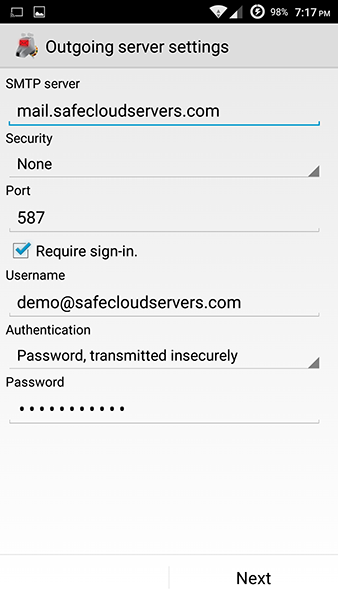
- The following screen shows you some options, customize them as you please. We recommend selecting the option "Enable push mail for account", this way new e-mails are received immediately. Here are some common settings for this screen:
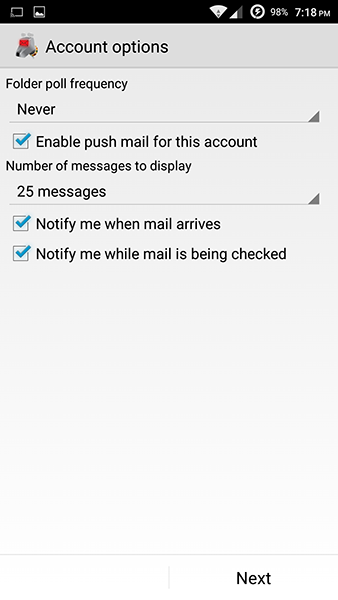
- Click 'Next" and you're done!
iOS Devices (iPhone, iPad, etc.)
To set up email on your iOS device, follow these stes.
- Locate the 'Settings' app and open it.
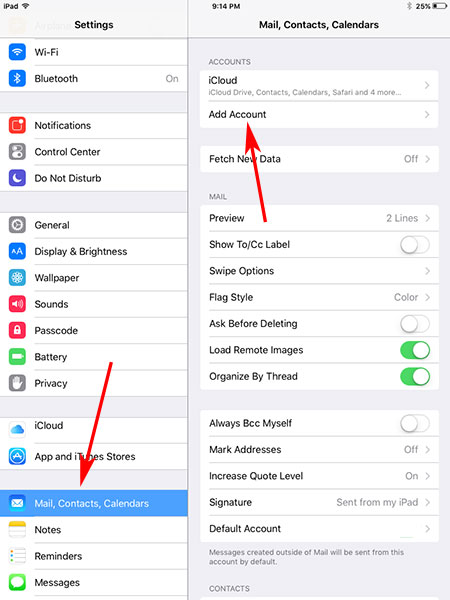
- Click 'Mail, Contacts, Calendars', then 'Add Account'.
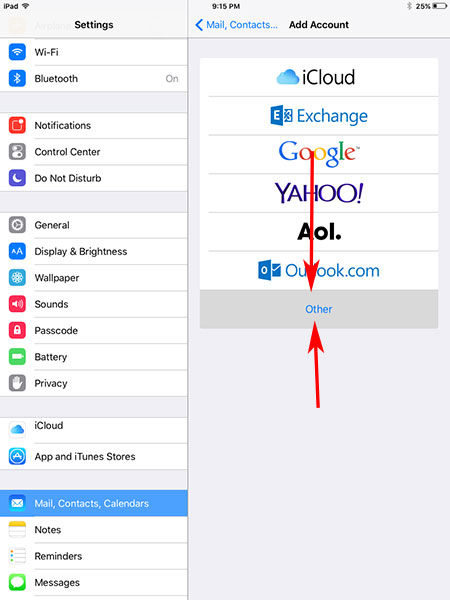
- Click 'Other' on the bottom.
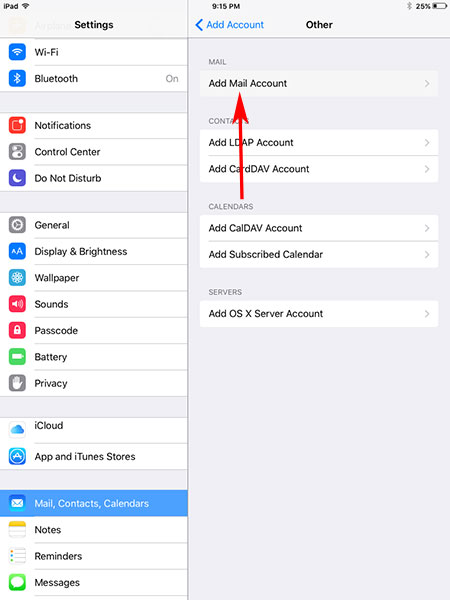
- Select 'Add Mail Account'
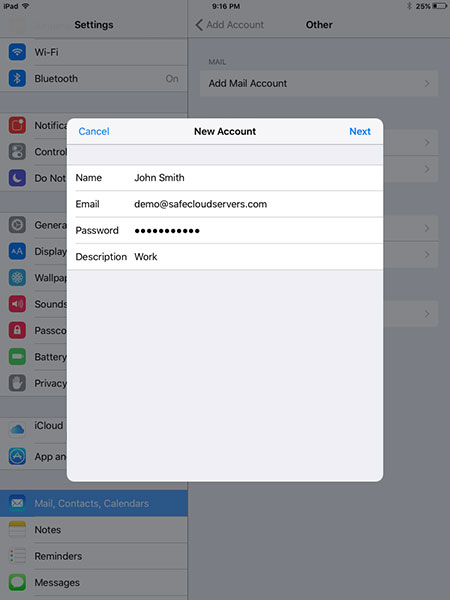
- Enter your name, e-mail address (ex: john@domain.com), password to the e-mail account and a description (ex: work). Click 'Next'
- Select IMAP (You may use POP if you like).
The 'Incoming Mail Server' and the 'Outgoing Mail Server' settings are identical. Fill them out, then click 'Next'.
Host Name: mail.domain.com (substitute domain.com with your domain)
User Name: Your full email address (ex: john@domain.com)
Password: The password to your e-mail account 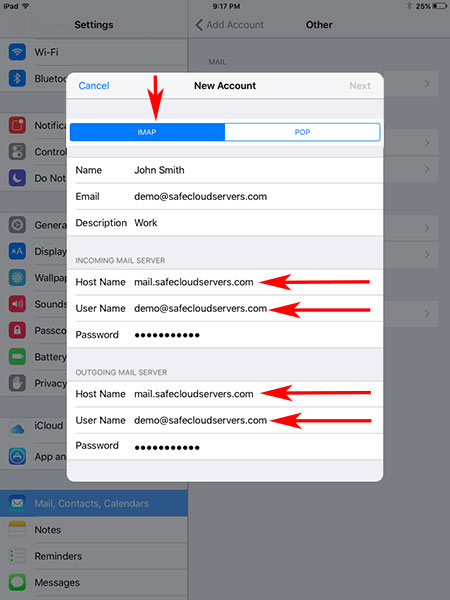
- If you receive a message stating 'Cannot Connect Using SSL', click 'Yes'.
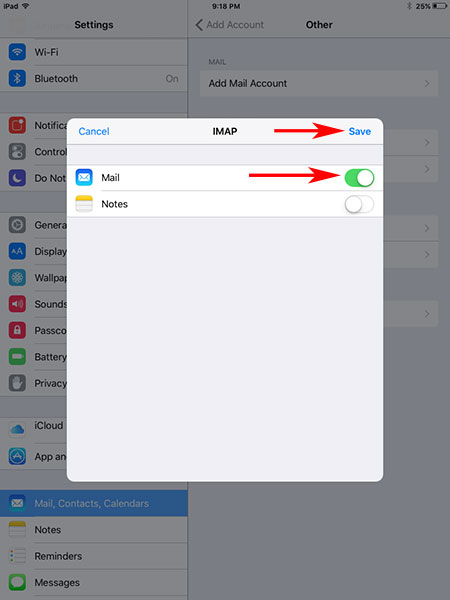
- After verification you are done. Click 'Save'.
